 how-to
Indian Wedding Photography Checklist: 7 Essential Steps
Table of Contents
- Step 1: Build Your Wedding Photography Shot List Template
- Step 2: Map the Multi-Day Wedding Photography Timeline
- Step 3: Capture Getting Ready Shots and Bridal Portraits
- Step 4: Cover Henna Application and Indian Wedding Detail Photos
- Step 5: Nail the Ceremony Rituals and Cultural Highlights
- Step 6: Organise the Indian Wedding Family Photo List
- Step 7: Plan Reception Decor, Candid Moments and Final Coordination
- Frequently Asked Questions
Last Updated: October 19, 2026
Step 1: Build Your Wedding Photography Shot List Template
A wedding photography checklist is a written plan that names every image you want captured, grouped by moment and location. For an Indian wedding, that list carries far more weight than it does for a single-day ceremony. Multi-day celebrations, sacred rituals and large family groups leave no room for improvisation.
At Khush Studio, we have photographed Asian weddings since 2002. Couples who arrive with a written shot list often get a complete album, while those who wing it may find themselves chasing gaps after the wedding.
Start your template with five columns:
- Moment (for example, Anand Karaj, Mehndi, reception entrance)
- Must-have people (names, not "family")
- Location and time
- Priority (essential or nice-to-have)
- Notes (sensitivity, seating, cultural detail)
Step 2: Map the Multi-Day Wedding Photography Timeline
A multi-day wedding photography timeline is a schedule that assigns each event its own coverage window, photographer and buffer. Most Indian weddings run across three or more days, and each day has a different rhythm. Treating them as one long shoot is where coverage breaks down.
Map the timeline backwards from the ceremony. Then check three things:
- Travel time between venues, with a realistic buffer for traffic and late starts.
- Golden-hour windows for couple portraits, booked before dinner, not after.
- Rest blocks for your photography team, because a tired crew on day three misses details.
We plan coverage per event rather than per day.
A common mistake is booking one team for every function without checking their stamina and equipment backup. Ask directly how many shooters attend each event and what happens if a camera fails mid-ceremony.
Step 3: Capture Getting Ready Shots and Bridal Portraits
Getting ready shots are the quiet, high-emotion images taken before the ceremony: hands being adorned, jewellery being fastened, and the first look in the mirror. These are the photographs families return to most, and they need calm, not chaos.
Give your photographer a dedicated 45 to 60 minutes for getting ready. Then keep the room uncluttered.
- Clear bags, boxes and phone chargers out of frame
- Have the bridal jewelry and groom attire laid out before the team arrives
- Choose a room with window light rather than overhead bulbs
- Brief one family member to manage the door
Bridal portraits work best in soft, directional light. We look for a window or shaded outdoor spot with a clean background, then use a shallow depth of field to isolate the bride.
For grooms, plan a shorter styling block covering the turban, the sehra and the sherwani buttons. These small frames balance the album.
Step 4: Cover Henna Application and Indian Wedding Detail Photos
Indian wedding detail photos are the close-up images of the objects and artistry that define the day: henna patterns, ring dishes, bangles, shoes and table settings.
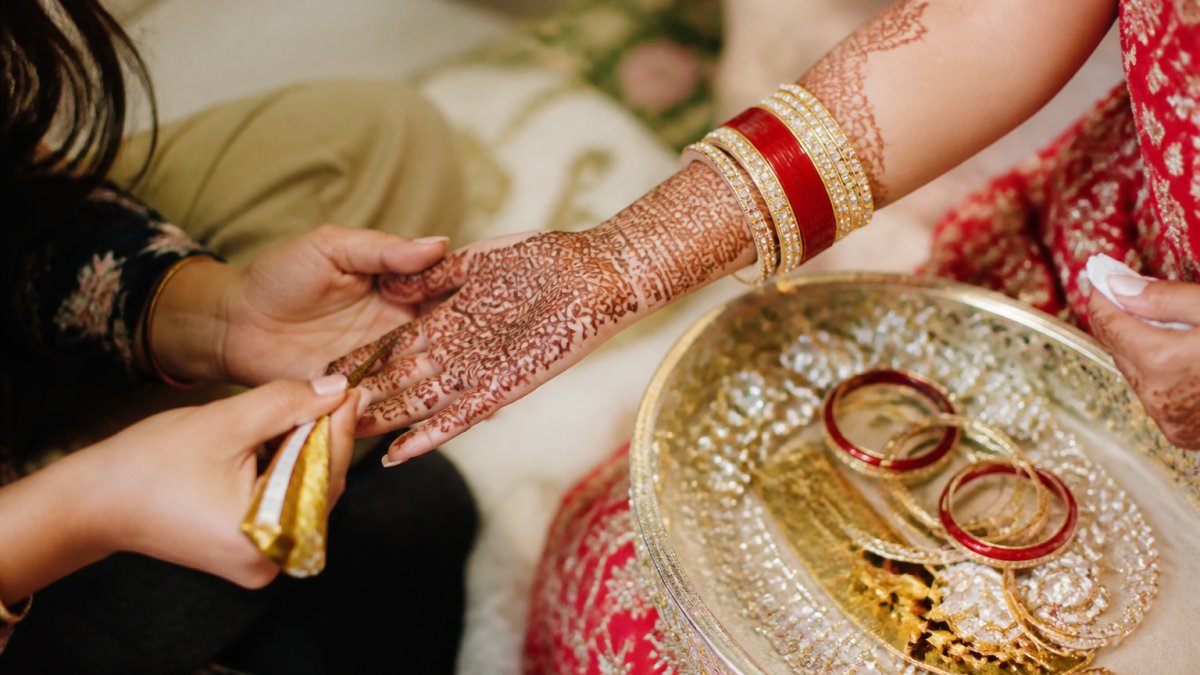
Schedule the henna application shoot for when the design is fresh and the light is good.
Our detail checklist for this stage:
- Henna in progress, plus the finished design on both hands and feet
- Bridal jewelry laid flat on a ring dish or fabric
- Bangles stacked on the wrist
- Shoes, clutch and perfume styled together
- Invitation suite and favors
- Centrepieces and table settings before guests sit
Shoot details early. Once guests arrive, the gift table becomes a pile and the table settings lose their shape.
Step 5: Nail the Ceremony Rituals and Cultural Highlights
Ceremony highlights are the ritual moments that carry the meaning of the wedding: the Anand Karaj readings, the Nikah signing, the exchange of garlands, the sindoor and the mangalsutra. Missing one of these is the single biggest fear couples raise with us.
Most checklists stop at naming the rituals. Each ritual has its own timing, its own sightlines and its own moments that last only seconds. We build a ritual-specific shot breakdown for every ceremony, and we ask the couple or a nominated family member to walk us through the order of events before the day. Below is the level of detail we work to.
Anand Karaj (Sikh ceremony)
- Palla ceremony: the father or elder ties the palla to the bride's dupatta. Shoot from the side to capture both hands and the fabric. This lasts under a minute.
- Four laavan: one shot per laav as the couple circles the Guru Granth Sahib. Position near the officiant for the first and fourth, and wider for the middle two.
- Ardaas: the standing prayer. Stay low and wide; do not cross the congregation.
- Karah prasad: distribution after the ceremony. A candid wide frame works better than a posed shot.
Nikah (Muslim ceremony)
- The signing: the nikah nama is signed in near-silence, often at a table. Get the pen-on-paper frame and the witnesses' faces.
- Wali's consent: the moment the bride's guardian confirms consent. This is quiet and easy to miss; brief the photographer on who is speaking.
- Rings and dua: the exchange and the closing prayer. A fast lens is essential in dim prayer halls.
Hindu ceremony
- Kanyadaan: the bride's father gives her away. Shoot from the couple's side, not behind the officiant.
- Saptapadi: the seven steps. One frame per step is the safest approach; the couple moves quickly.
- Mangalsutra and sindoor: the groom ties the necklace and applies the sindoor. These are the most-photographed seconds of the day. Position front-left of the couple and stay still.
- Vidaai: the farewell. This is emotional and unpredictable; shoot wide and let it happen.
Any ceremony
- The entrance, the garland exchange (jaimala) and the blessings from elders.
Lighting matters here more than anywhere else. Many ceremony venues are dim, and flash can be intrusive during prayer. A photographer who understands the ritual knows when to move and when to stay still. Ask what lenses they bring for low-light ceremony work and whether they carry a backup body.
Step 6: Organise the Indian Wedding Family Photo List
An Indian wedding family photo list is a written schedule of every group portrait, with names and the order they will be taken. Without it, the family formal session becomes a slow, disorganised hour that eats into cocktail hour.
Group photos can be challenging when nobody knows who should be standing where. In Indian weddings the problem is compounded by scale.
Build your list like this:
| Priority | Group | People included | Time slot |
|---|---|---|---|
| 1 | Immediate families | Parents, siblings, grandparents | 20 mins |
| 2 | Extended paternal family | Aunts, uncles, cousins | 15 mins |
| 3 | Extended maternal family | Aunts, uncles, cousins | 15 mins |
| 4 | Wedding party | Bridesmaids, groomsmen | 10 mins |
| 5 | Friends and colleagues | Named groups | 10 mins |
That table is the skeleton. The detail that saves the session is in the notes column, and it needs to cover five things a generic list misses:
- Both sides, separately and together. Paternal and maternal families are usually photographed as distinct groups before any combined shot. Name the eldest member of each side and seat them first; everyone else arranges around them.
- Elder protocol. Elders are seated, not standing, and they are photographed first while they are fresh. Build the order so the oldest relatives are done within the first fifteen minutes.
- Remarried and blended families. List each grouping explicitly, in neutral language, and confirm with both partners before the day. Do not improvise these on the spot.
- Overseas relatives. If family are travelling in, confirm arrival dates against the photo schedule. A group shot planned for Friday is worthless if half the group lands on Saturday.
- The couple's own list. Ask each partner to name the five groupings they would regret missing. Those five go to the top of the list regardless of size.
Nominate one outgoing relative as the "wrangler" for each side. They gather people while the photographer sets the frame. This one role can save significant time. Give each wrangler a printed copy of the list, not a link.
A common pattern is a family session that overruns because groupings were added at the last minute. Protect the schedule by deciding in advance that any addition goes to the end of the list, after the priority groups are done.
Step 7: Plan Reception Decor, Candid Moments and Final Coordination
Reception decor and candid guest interactions are the final layer of the album, and they need their own plan. Decor photographs should be taken before doors open. Candid moments happen all night, and they are the images that show what the wedding actually felt like.
Book a 20-minute decor window before guests enter. Then let the evening run.
- Photograph the stage, centrepieces and table settings in clean light
- Capture the entrance, first dance and speeches
- Look for guest interactions: laughter, tears, children dancing
- Cover the gift table and guest book early in the evening
Final coordination is the step most couples skip, yet it is the last item on any wedding photography checklist. Two weeks before the wedding, send your photographer the final shot list, the timeline, a contact for each venue and a named family lead for each event.
Frequently Asked Questions
What should be on an Indian wedding photography checklist?
A complete Indian wedding photography checklist covers every ritual across all events: getting ready shots, henna application, ceremony highlights such as the Anand Karaj or Nikah, family formals, reception decor and candid guest moments. Add a wedding photography shot list template with must-have shots, a family photo list with names, and a multi-day timeline. Share it with your photographer at least four weeks before the first event so nothing is missed.
How do you plan photography for a multi-day Indian wedding?
Build a multi-day wedding photography timeline that lists each event, venue, start time and key ritual moments. Assign styling blocks for getting ready and detail shots before guests arrive. Confirm travel time between venues and agree coverage hours per day. A three-day celebration typically needs separate mehndi, ceremony and reception plans, so share the schedule with your photographer early and review it together two weeks before the wedding.
How can couples make sure important family photos are not missed?
Create an Indian wedding family photo list with each group's names and relationships, then assign a family member to gather people at a set time. Schedule family formals during a quiet window, usually right after the ceremony, and keep groups to around ten combinations so it stays quick. Give the list to your photographer in advance and confirm who will help coordinate on the day.
Should you give your wedding photographer a shot list?
Yes. A shot list guides your photographer through must-have shots, cultural rituals and family groupings without restricting their creativity. Keep it focused on essentials: ceremony highlights, detail photos, and family formals. Experienced Asian wedding photographers will already know key moments, but a written list confirms your priorities and prevents gaps, especially across multi-day events with different venues.
A complete Indian wedding photography checklist takes effort, but it removes the guesswork from your biggest days. Khush Studio has spent over 20 years documenting Indian, Sikh and Muslim weddings, with a discreet approach and tailored packages built around your rituals. Our team captures the quiet getting ready moments, the sacred ceremony highlights and the candid joy in between. Enquire with Khush Studio and start your wedding photography plan with a team that knows what to look for.